

How to Guarantee Coffee Bean Consistency in 2026
Table of Contents
- Why Coffee Bean Consistency Starts Before the Grinder
- Step 1: How to Store Coffee Beans Properly for Stable Results
- Step 2: Read a Coffee Grind Size Chart Before You Dial In
- Step 3: Calibrate Your Burr Grinder and Test Particle Distribution
- Step 4: Use the RDT Coffee Technique to Kill Static and Clumping
- Step 5: Adjust for Bean Density, Roast Profile, and Humidity
- Common Mistakes That Break Coffee Bean Consistency
- Frequently Asked Questions
Last Updated: September 15, 2026
Why Coffee Bean Consistency Starts Before the Grinder
Coffee bean consistency is the practice of controlling every variable that affects how your beans extract, from storage conditions and roast freshness to grind particle distribution and environmental humidity. Chasing consistency at the grinder alone is a losing battle. The beans themselves, how they're stored, how fresh they are, and how their density shifts with roast level, determine whether your grind behaves predictably or fights you every morning. Below, we'll walk through the exact steps to lock in repeatable results, including the calibration techniques and environmental adjustments most guides skip entirely.
Step 1: How to Store Coffee Beans Properly for Stable Results
The best way to store coffee beans properly is in an opaque, airtight container kept away from light, heat, moisture, and oxygen. Store beans whole at room temperature, never in the fridge or freezer for daily use, and grind immediately before brewing.
Why does this matter for consistency? Because stale beans and fresh beans grind differently. As beans age, they lose moisture and become more brittle, which produces more fines and a wider particle spread at the same grinder setting (What is the Shelf Life of Roasted Coffee? A Literature Review on Coffee Staling). A bag that's three weeks old will not dial in the same way as one roasted five days ago.
- Use an opaque, airtight container with a one-way degassing valve if possible
- Keep beans whole until the moment you brew
- Store at room temperature, away from the stove, window, or any heat source
- Buy in quantities you'll finish within two to three weeks of the roast date
According to guidance from the Specialty Coffee Association on coffee storage, oxygen, moisture, heat, and light are the four primary enemies of freshness. Controlling all four is the foundation of any consistency routine.
If you're ordering roasted-to-order beans, you're starting with a fresher baseline than grocery shelf stock. That freshness gives you a wider, more predictable window for dialing in your grind.
Step 2: Read a Coffee Grind Size Chart Before You Dial In
A coffee grind size chart maps each brew method to a target particle range, and reading it correctly before you touch your grinder saves you from chasing settings blindly. Grind size determines extraction rate: finer grounds expose more surface area and extract faster, while coarser grounds slow the process down.
| Brew Method | Grind Size | Approximate Particle Range | Typical Contact Time |
|---|---|---|---|
| Espresso | Fine | 200-300 microns | 25-30 seconds |
| Moka pot | Fine-medium | 300-400 microns | 4-5 minutes |
| Pour-over | Medium | 400-600 microns | 2-4 minutes |
| Drip | Medium | 500-700 microns | 4-6 minutes |
| French press | Coarse | 800-1000 microns | 4 minutes steep |
| Cold brew | Very coarse | 1000+ microns | 12-18 hours |
The chart is a starting point, not a destination. Every grinder, bean, and brew method combination shifts the target slightly. Use the chart to get in the neighborhood, then dial in by taste.
Step 3: Calibrate Your Burr Grinder and Test Particle Distribution
Calibrating your burr grinder means establishing a true zero point, verifying that the burrs are aligned, and then confirming output with a physical measurement, not a guess. Without calibration, your "setting 12" can mean something completely different from one week to the next, and no amount of dialing in by taste will fix a grinder that has drifted.
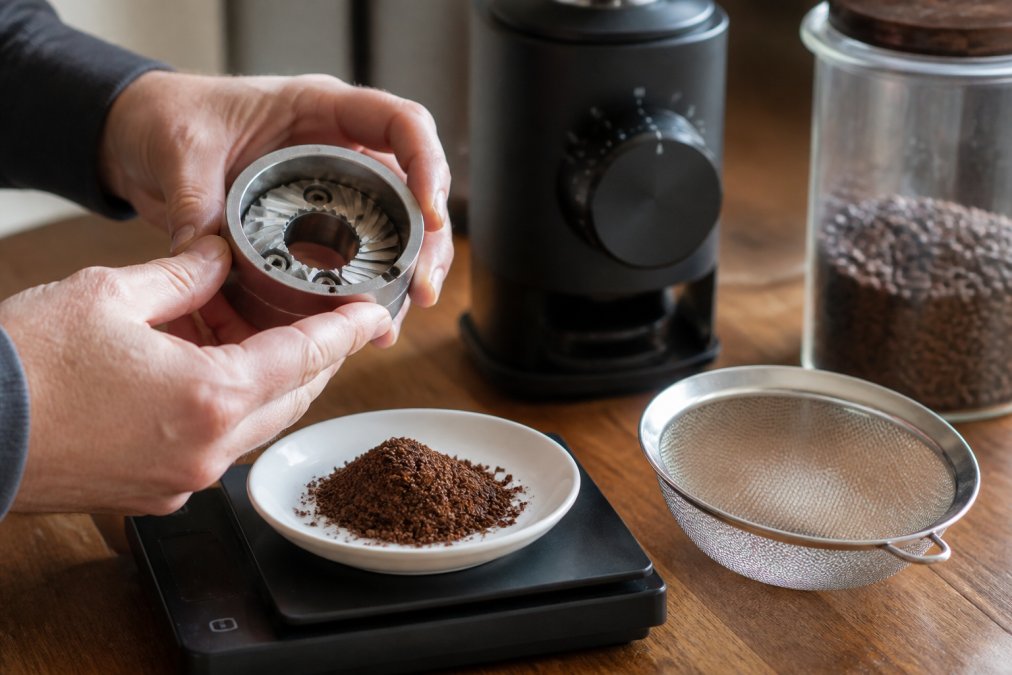
Calibration sequence
- Clean the burrs completely with a brush and grinder cleaning tablets. Old oils and packed fines change the effective gap between burrs.
- Find true zero by slowly closing the burrs until they just touch (you'll hear a faint chirp), then back off one click. Mark this position.
- Check burr alignment by inspecting the wear pattern on both burrs after a grind. An uneven pattern, one side polished, the other untouched, signals misalignment.
- Run a sieve analysis (detailed below).
- Record your baseline so you can detect drift over time.
Why particle distribution matters more than grind size
A grinder doesn't produce one uniform particle size. It produces a distribution: a target range, plus two problem populations.
- Fines, particles smaller than roughly 200 microns. They extract fast and can push a brew bitter or muddy.
- Boulders, particles larger than roughly 1,000 microns for filter, or above your target range for espresso. They under-extract and leave the cup sour or hollow.
- Target range, the bulk of the dose, sized to your brew method.
A well-aligned flat burr grinder in good condition typically concentrates most of the dose in the target range with a modest tail of fines. A misaligned or worn grinder spreads the distribution wide, more fines and more boulders at the same setting. That spread is what makes a brew taste inconsistent from cup to cup even when nothing else changed.
Running a sieve analysis
You don't need lab equipment. A stack of standard test sieves and a kitchen scale will do.
- Weigh 20 grams of freshly ground coffee.
- Stack sieves from coarsest on top to finest on the bottom, with a catch pan underneath. Common sizes for coffee work are 1,000, 800, 600, 400, and 200 microns.
- Shake for 2-3 minutes, a consistent, rhythmic motion. Inconsistent shaking skews results.
- Weigh each fraction and divide by 20 to get the percentage in each band.
- Record the distribution alongside your grinder setting, bean, and roast date.
Reading the results
- If the majority of the dose lands in your target band and fines stay in the low single digits by weight, your grinder is behaving.
- If fines climb noticeably or boulders dominate, suspect misaligned burrs, worn burrs, or a grinder that can't hold a setting under load.
- If the distribution shifts between two bags of the same coffee, the variable is usually the bean (freshness or roast), not the grinder.
Retention also matters: a grinder that holds a gram or two of old grounds contaminates every fresh dose and quietly widens your distribution. Purge a few grams before each brew, or weigh output rather than input.
Step 4: Use the RDT Coffee Technique to Kill Static and Clumping
The RDT coffee technique, short for Ross Droplet Technique, is the practice of adding a tiny amount of water to whole beans before grinding to eliminate static electricity and clumping. One or two spritzes from a water bottle, or a quick stir with a damp spoon, is enough.
Static and clumping are quiet consistency killers. Static makes fines cling to the grinder chute and land unevenly in your basket. Clumps create channels where water flows faster, causing uneven extraction even when your particle distribution is technically fine.
- Add one spritz of water to the beans before grinding
- Stir gently to distribute moisture evenly
- Grind immediately after moistening
- Expect less retention in the chute and a cleaner basket
A common mistake is over-wetting the beans. Too much water causes rust on steel burrs and gummed-up grind chambers. One or two spritzes is plenty.
Step 5: Adjust for Bean Density, Roast Profile, and Humidity
Bean density and roast profile change how a bean fractures in the grinder, and ambient humidity changes how those grounds behave once they hit the brew water. This is the step most guides skip, and it's the one that separates consistent brewers from frustrated ones.
How roast level changes grind behavior
Green coffee is dense and hard.
Bean density and origin
Humidity and static
Building a brew log that actually works
Keep a simple log with these fields:
Common Mistakes That Break Coffee Bean Consistency
Frequently Asked Questions
Does grind consistency affect coffee flavor?
Yes, grind consistency directly controls how evenly water extracts flavor from coffee grounds. Uniform particles extract at the same rate, giving you a predictable flavor profile. When you have fines and boulders mixed together, the small particles over-extract and turn bitter while the large ones under-extract and taste sour. Fixing coffee bean consistency at the grinder is the fastest way to fix a cup that tastes muddy or hollow.
What do baristas spray on beans before grinding?
Baristas spray a small amount of water on coffee beans before grinding, a method called the RDT coffee technique (Ross Droplet Technique). One or two sprays from a water bottle per dose of beans reduces static electricity, which stops grounds from clinging to the grinder and reduces clumping. Less static means fewer boulders and a cleaner particle size distribution in the basket.
How do I choose the right grinder for consistent results?
A burr grinder gives you the uniformity a blade grinder cannot. Blade grinders chop beans unevenly, producing a mix of powder and chunks that ruins coffee bean consistency. Flat burrs favor clarity and separation in light roasts, while conical burrs handle darker, oilier beans with less retention. Look for stepless adjustment, low retention, and burrs rated for the volume you grind each week.
How can you tell if coffee beans are high quality?
Freshness and uniformity show up before you brew. Look for a roast date within two to four weeks, whole beans with an even color and no oily sheen on lighter roasts, and a consistent size across the bag. Store beans in an airtight, opaque container away from heat and light. If the same bag tastes different every morning, the issue is usually storage or grind setting, not the beans.